Purse Repair. DIY Sewing. Mom Pursinality Episode 1.

Frugal to the point of recklessness.

WIN_20140527_161042

I like the bag my in-laws gifted to me a couple Christmas’ ago. Problem is, I’ve been a Mom Purse person since high school (many years before my actual state in life warranted such a title, incidentally). Folks of the Mom Purse mentality understand that paring down what’s carried in the purse is never a good solution, even when shoulder a soar from the sheer weight of the items.

And don’t bother thinking that something that hasn’t been used in a month ought to be tossed aside from the purse. No! It may be used next month. You see, folks with Mom Purses thrive on having EVERYTHING handy. You don’t need EVERYTHING every day. But you do need EVERYTHING, eventually. And if you don’t, surely someone you encounter will need it. For instance, 1 pen is never enough in a purse. This, of course, is because someone will need to borrow one when you are using yours. Hasn’t this happened to you? Let’s stop a moment, assess our lives, and realize that all of us, at some point or other have either been the beneficiary or the benefactor of a spare pen. We all need Mom Pursinalities in our lives.

WIN_20140527_161105

Wait. We were talking about this specific purse. Sorry. I felt the need to explain Mom Purses. This particular one is lovely, but of very light weight fabric. Ergo, it burst at the seems. Several of them. As in, the weight of the necessary items in my purse caused the fabric to pull away from the seems.

WIN_20140527_161130

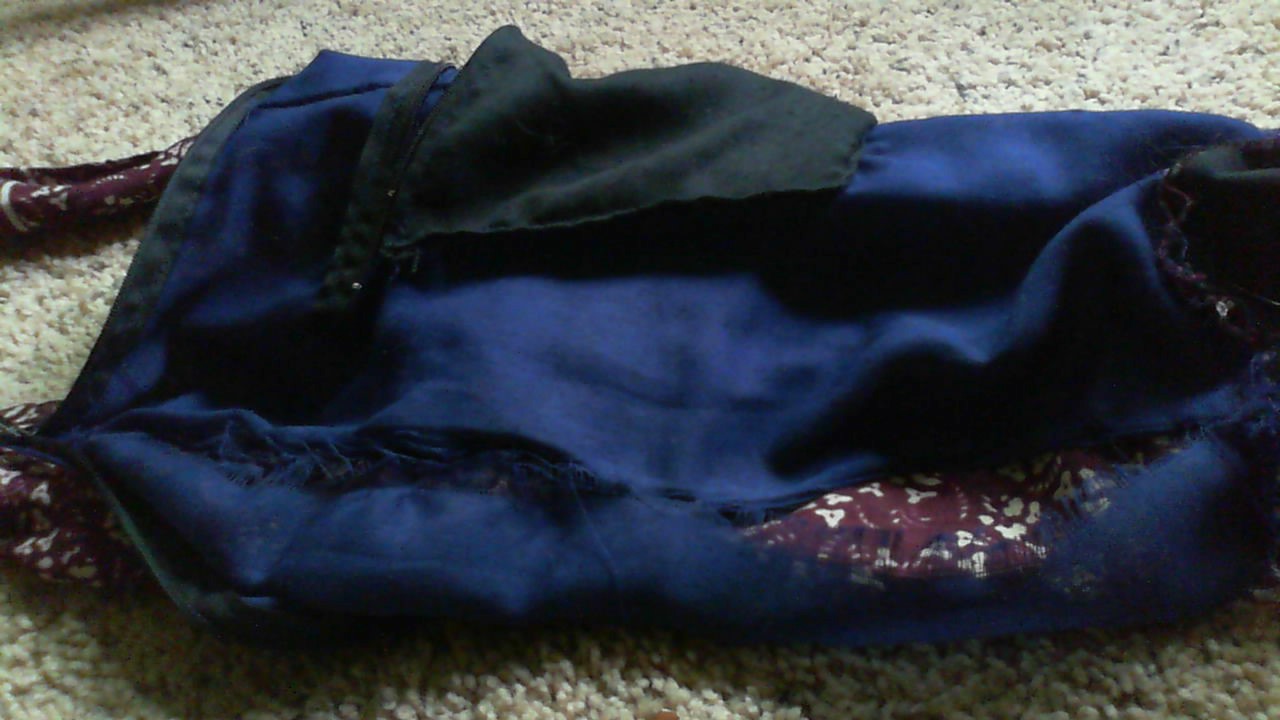
Here’s an example. There’s a big hole that shouldn’t be there. This wouldn’t be a problem for a reasonable person of the Minimalist Pursinality. Like my sister. My brain will never understand this http://wechoosetolivethislife.blogspot.com/2011/06/some-summer-organization.html.

One may think that I should just get a stronger purse to suite my pursinality (oh man, I’m having fun with this pun. Sorry! It’s punny! It just came out, out of nowhere!). A new, stronger purse would that would cost money and time. So I’m going to modify this one to suit my Mom Pursinality.

My goals: repair, add compartments, reduce strain on current seams, preserve exterior appearance while enhancing shape definition.

I’ve gotten as far as repairing the burst seems. Will I ever get to the re-enforcement and enhancement stages? Stay tuned! Time will tell.

Love,
Miss Mary Clare

Photo: shabby chic & cottage style inspiration.

WIN_20140526_102141

I took this photo last week using our tablet PC. It’s completely raw and unedited. I didn’t even crop it. Not to be bragadocious, but I think it’s perfect. Sure, there are several things wrong with it from a fine photography perspective. I probably will never hang this on a wall. You can see our window screen, for one thing. And the yards aren’t exactly pleasing to the eye. What I love and what makes it, to my mind, better than an edited or well-planned image, is that it speaks for itself. It captures the reality in the same way it captured me out of the corner of my eye while I was busy with many ordinary things. It’s beautiful. It’s ordinary. It’s unexpected that the two would become one on a random Saturday when I’m cleaning the high chair tray for the 10th time that day and hoping desperately that nap time will come soon.

Also, this photo is in style! I’ve never wanted to pin myself down to a trend (even if I love it!), but I can’t help but notice that this photo would be great inspiration for anyone re-decorating their home in the popular cottage style.

I’ve been thinking a lot about ordinary life. As a friend shared recently: ‘God must really love ordinary life, because he sure created a lot of it!’. This image is there in the midst of our ordinary life. Ordinary life is full of beauty.

I want to share this with you in hopes that your day today is ordinary.

MMC

The Horrific Menu Planning Escapade: Update

Good evening,

I feel it only right and proper to follow-up on my Meal Planning tirade of a few days back.

Here’s what it looked like. Prepare to be impressed.

IMG_2324

That’s right. Two and a half DPSs (double page spreads. Is this term still used in publishing? I’m a late 90’s year book geek.) from my calendar with main dinner dishes scrawled into the inner margins for each week/dps. There are a maximum of two per week. Nothing more. But nothing less either! And you know what? It helped my life and sanity level, but only once I remembered that I had written my Menu Plan in to my calendar. Never mind that for several days I haphazardly wondered 6.3 times per day what the heck to serve for dinner. Eventually, the horror of my Menu Planning Escapade of a few days back re-surfaced, and I actually used the Plan! And I had already shopped for the items needed! Win win!

IMG_2327

Despite the major mental whiplash caused by me, of all people, menu planning, I am pleased and peaceful with a couple things:

1) For one menu, I planned an actual menu! “Chix and chocolate cake.” There it is, in writing, for all of history. What more does one need in a meal than chix (ie chicken) and chocolate cake?
2) I gave myself lots of freedom within the structure. Having learned that over planning can produce stress just as often as under planning, I didn’t assign certain dishes to certain days. I just knew, given our schedule for the next couple of weeks, that cooking twice a week would be reasonable.
3) I didn’t matter much what meal went on which day. If I remember correctly, I simply put the dish with veggies that would go bad most quickly on the first page of the first week. And chocolate cake with chix, naturally, went on the day when we were having friends for dinner.

That’s it. That’s all I have to say about Menu Planning.

Love,
Miss Mary Clare

Chocolate Volcanic Cake

Cave Person's Chocolate Cake 2

This is a cake. It is also a kitchen malfunction. And a marvelous example of a kitchen malfunction, if I do say so myself. It’s not supposed to be sunken into itself. I need to work on helping my cakes with self esteem and posture.

This is me puzzling over a) how to work the camera (I had it pointed in the wrong direction), and b) how to morph the malfunction into something lovely and fun that would honor our guests.

IMG_2303

Marketing geek that I am, I gave it a name – Chocolate Volcanic Cake – to make it at home with it’s sunken-ness. It is not a mistake. It’s an opportunity for creativity.  I would make a fantastic Marine. Assess, adapt, overcome! We inhaled this cake within 24 hours. By we, I mean I did. I had a little help from my family and our good friends, Rose and Chris who brought their toddler.  It tasted delicious, and I think it looked pretty darn good, too.

IMG_2307

This volcano has some awesome lava flows.

WIN_20140502_144345

This is proof that I’m attempting to learn from my mistakes. I mean kitchen malfunctions. I wrote in the cookbook margins the pan size, temperature, and cooking time. Next time, if I need a flat (boring!) cake, I have ideas for what to do. In the mean time, this happy accident provided lots of culinary and creative pleasure.

Love,

MMC


Shall I Clarify?

In my last post on MENU PLANNING, I included a list of things I enjoy. It’s been bugging me ever since I drafted it. This is mostly because a couple of the top items (ex: mocha) are completely frivolous. More important things (such as time with people and being of use to the world), are underneath them. It’s as if my priorities are all screwed up, and selfish.

Please understand – I’m saying this to myself as much as anyone – the list of what I enjoy in life is not the same as my list of priorities. There are two lists: Things I Enjoy in Life, and Priorities.  I do, I hope and pray, have acceptable items at the top of my priorities list. However, when I think of the transitory things of this world that I truly enjoy, mocha really is near number one. I need to be honest about that.

Now, regarding a priorities list. As soon as I am perfectly stable and figure it all out for keeps, I’ll post it. In other words, I may never post this list. I feel that a priorities list is too important to post on the fly. And our lives are too dynamic for most of us, most of the time, to be able to nail down a comprehensive list that can be accessed anywhere in the world, by anyone, at any time, for as long as the Internet shall live. I just don’t want to be nailed down in that way, or to nail myself down, for that matter. I prefer to inject a healthy dose of growth and mystery into the creation of such a list. So, ”dynamic”, I feel, is a good term to describe it. And blog posts, while possessing many positive characteristics, are not in themselves particularly dynamic.

Thank you for listening,

Miss Mary Clare

Baby Bib-alicious Part the Second

IMG_2096Previously on Baby Bib-alicious:

….Cutting? Noooo! You’ll ruin it!

Friends, I write today to assure you that the scary scissor escapade ended beautifully. As I cut a wider-than-I needed front piece for the bib (using the back of the shirt, the side that wasn’t stained, and the side seems), I realized that I could use the strips I was thereby creating as ties. And, to top it off (pun intended), the sleeves may as well remain for extra coverage.

But enough with words. You can see for yourself.Image

This is it. The bib. I could have stopped here, waited for babe to wake, and commenced with tying it on and feeding her the standard breakfast of bananas and yogurt. This is double-knit fabric, so it won’t unravel.

IMG_2095

But see those scalloped edges? They are down right pretty. The cut edges seemed unfinished in contrast, and since my sewing machine was already set up, I went ahead and folded over each of them to sew it down, creating a hem. This also gave it more structure, so it may last a little longer. We’ll see!

IMG_2096

Here’s a handy picture showing the cuts.

Here’s a list of the cuts so that you can make this bib yourself:

1. Wide front panel (remove).

2. 2-4 inches out towards the side seems from front panel, cut straight up to the shoulder seem. This becomes the ties.

3.  Chop off long sleeves, making them short sleeves.

DIY bib from stained top

And that’s it! Simply put on child and tie, or hem the rough edges first. A half hour, or less, well spent. A garment destined for re-use finds meaning again in life.

Love,

Miss Mary Clare


Baby Bib-alicious.

DIY bib from stained top This is our daughter. The best part is her smile. She also sports a bib I recently made, using a cute little top that a friend gave us. The top was stained in front. (I had considered cutting it up for use as a rag. But it’s a cute little thing. And I feel it deserves to be worn.) Our daughter stains things when not wearing a bib. For that matter, she also stains bibs. (I’ll admit right off the bat that she gets this messy tendency from me. It’s part of her inheritance.) All our bibs – including my aprons, which are actually bibs for adults – were stained at the time. And unwashed. Somehow, I knew that these facts were destined for each other.  I enjoy helping people and things achieve their destiny (destinies?).

Baby Bib-alicious DIY bib from garment 2

I sat on the couch, gazing at the top. I thought about grabbing one of those dirty bibs to use as a template for cutting a new one from the top. But the fabric scissors was closer to me than the dirty bib. I went the easy route, grabbing the scissors, flipping the garment to the side with the stain, and starting to cut. Cutting! Oh no! You’ll ruin it! Want to know what happened next? Will the garment survive the butchering? Come back soon to find out! Affectionately, Miss Mary Clare